How to replace a bulb in a galvanized light fixture?
Jun 25, 2025
How to Replace a Bulb in a Galvanized Light Fixture
As a supplier of Galvanized Light Fixtures, I understand that many customers may encounter the need to replace bulbs in these fixtures. Galvanized light fixtures are popular for their durability and rustic charm, commonly used in various settings such as homes, barns, and outdoor spaces. In this blog, I'll guide you through the process of replacing a bulb in a galvanized light fixture, ensuring a safe and successful replacement.

Step 1: Safety First
Before you start any work on your light fixture, safety should be your top priority. Galvanized light fixtures, like any electrical equipment, can pose a risk of electric shock if not handled properly.
- Turn off the power: Locate the circuit breaker or fuse box that controls the light fixture. Switch off the corresponding breaker or remove the fuse. This will cut off the electrical supply to the fixture, preventing any accidental shocks. To be extra cautious, you can use a non - contact voltage tester near the fixture to confirm that there is no electricity present.
- Wear protective gear: Put on a pair of insulated gloves and safety glasses. Insulated gloves will provide an extra layer of protection against electric shock, while safety glasses will protect your eyes from any debris that may fall during the bulb replacement process.
Step 2: Identify the Type of Galvanized Light Fixture
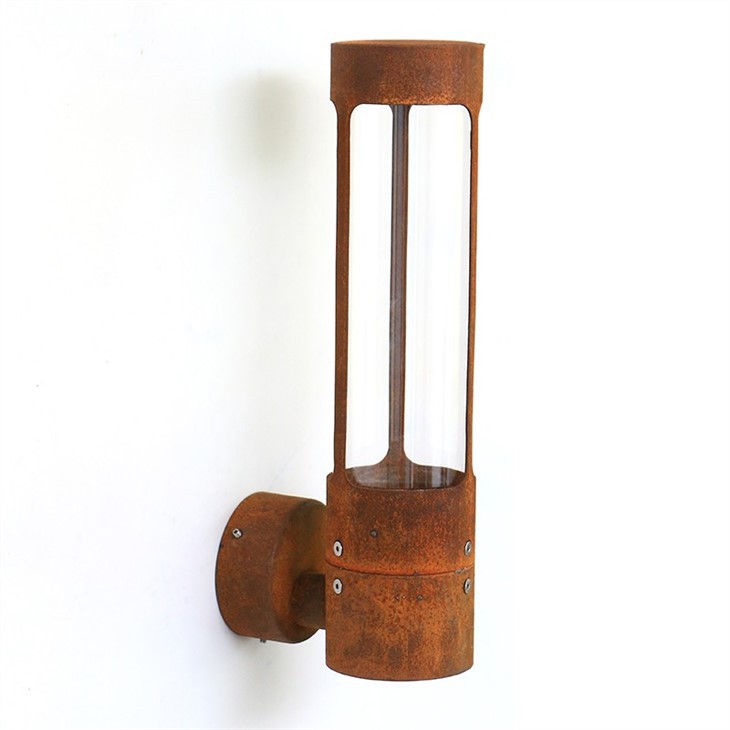
Galvanized light fixtures come in various types, such as Galvanized Wall Light, Galvanized Outdoor Barn Light, and Outdoor Round Wall Light. Each type may have a slightly different design for accessing the bulb.
- Wall - mounted fixtures: These are typically attached to the wall. Some may have a simple screw - on or snap - on cover that you need to remove to access the bulb. Others may have a more complex design with a decorative cage or housing.
- Outdoor barn lights: These are usually larger and more rugged. They may have a protective glass cover that needs to be removed first. The cover is often held in place by screws or clips.
- Round wall lights: These fixtures often have a circular design. The access to the bulb may be through a central panel or a removable outer ring.
Step 3: Remove the Fixture Cover
Once you've identified the type of fixture, it's time to remove the cover to access the bulb.
- Screw - on covers: Use a screwdriver to remove the screws that hold the cover in place. Place the screws in a safe place, such as a small container, so you don't lose them.
- Snap - on covers: Gently pry the cover off using a flat - head screwdriver or your fingers. Be careful not to apply too much force, as you may damage the cover or the fixture.
- Caged or decorative covers: Some fixtures have a cage or decorative housing that needs to be removed. This may involve unscrewing bolts or releasing clips. Follow the design of the fixture to safely remove the cover.
Step 4: Remove the Old Bulb
With the cover removed, you can now access the old bulb.
- Twist - type bulbs: Most bulbs are of the twist - type. Hold the bulb firmly and turn it counter - clockwise. If the bulb is stuck, don't force it. You can try using a pair of rubber gloves to get a better grip.
- Pin - based bulbs: Some fixtures use pin - based bulbs. These are removed by gently pulling the bulb straight out. Make sure to hold the base of the bulb and not the glass part.
- Dispose of the old bulb properly: Once the old bulb is removed, place it in a safe container. Incandescent bulbs can be disposed of in the regular trash, but if you have a CFL or LED bulb, it's important to recycle them properly due to the presence of mercury or other hazardous materials in CFLs and the valuable components in LEDs.
Step 5: Select the Right Replacement Bulb
Choosing the right replacement bulb is crucial for the proper functioning of your galvanized light fixture.
- Check the wattage: Look for a label on the fixture or in the user manual that indicates the maximum wattage the fixture can handle. Using a bulb with a higher wattage than recommended can cause overheating and damage the fixture.
- Consider the type of bulb: You can choose between incandescent, CFL, or LED bulbs. Incandescent bulbs are the traditional choice, but they are less energy - efficient. CFLs are more energy - efficient but contain a small amount of mercury. LEDs are the most energy - efficient and have a long lifespan.
- Match the base type: Make sure the base type of the replacement bulb matches the base type of the old bulb. Common base types include E26 (standard medium base), E12 (candelabra base), and GU10 (pin - based base).
Step 6: Install the New Bulb
Once you've selected the right replacement bulb, it's time to install it.
- Twist - type bulbs: Insert the bulb into the socket and turn it clockwise until it is firmly in place. Make sure not to overtighten the bulb, as this can damage the socket.
- Pin - based bulbs: Align the pins of the bulb with the slots in the socket and gently push the bulb in until it is fully seated.
Step 7: Replace the Fixture Cover
After installing the new bulb, it's time to put the cover back on.
- Snap - on covers: Align the cover with the fixture and press it firmly until it snaps into place.
- Screw - on covers: Place the cover back on the fixture and insert the screws. Use the screwdriver to tighten the screws, but don't overtighten them.
- Caged or decorative covers: Reattach the cage or decorative housing using the bolts or clips. Make sure it is securely fastened.
Step 8: Restore Power and Test the Fixture
Once the cover is back on, it's time to restore power to the fixture.
- Turn on the power: Go back to the circuit breaker or fuse box and switch on the corresponding breaker or replace the fuse.
- Test the fixture: Flip the light switch to turn on the fixture. If the bulb doesn't light up, double - check that the bulb is properly installed and that the power is on. If the problem persists, there may be an issue with the fixture itself, and you may need to contact a professional electrician.
Conclusion
Replacing a bulb in a galvanized light fixture is a relatively simple process if you follow these steps. By taking the necessary safety precautions, identifying the type of fixture, and choosing the right replacement bulb, you can ensure a successful bulb replacement. If you have any questions or need further assistance with your galvanized light fixtures, don't hesitate to contact us for more information and to discuss your procurement needs. We are here to help you find the best lighting solutions for your projects.
References
- Electrical Safety Foundation International. "Electrical Safety Tips for Homeowners."
- Home Depot. "How to Replace a Light Bulb."